Article written by Jared Banks in 2014
If you are just joining us, this is the Sixth post in my Pen Sets series. Posts one through three are from Shoegnome and reference mostly Archicad 11. Posts Four and Five were recently published on BIM Engine and update my theories for Archicad 17 (and everything else I’ve learned since 2011).
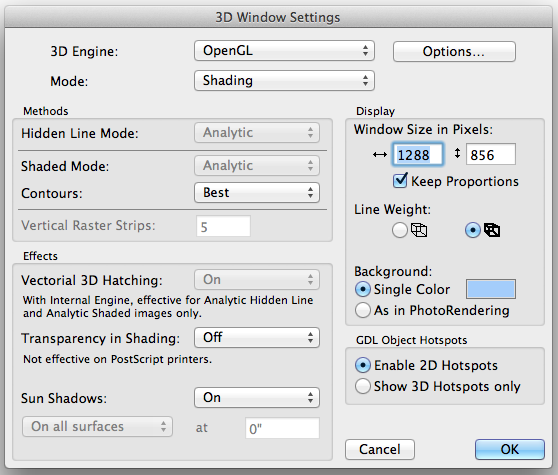
I worked for years in a firm that used both Archicad and SketchUp (the division was based on the preference of the various coworkers in the office). The default assumption was that SketchUp made prettier models than Archicad. This of course was a misunderstanding of the situation—both programs can produce awesome visuals. What was really happening was that there were a few defaults within Archicad and a few omissions made by Archicad users that hindered the quality of the 3D window. Pen Sets are one key to fixing what many users think is a deficiency in Archicad. But before we can talk about how Pen Sets improve the 3D window we need to also look at some other ways to improve the quality of the 3D window. And unless I note otherwise, most of these changes are made in the 3D Window Settings.
- Internal Rendering Engine vs Open GL. Please stop using the Internal Rendering Engine to explore in 3D. I know you get to see your hatch patterns. But it’s so slow. And just no. It is not going to get your clients excited. Most of the users I know that are using the Internal Rendering Engine are long time users and just never made the switch all those years ago to Open GL. This group also tends to avoid the 3D Explore mode. Don’t be like that. Use the Explore mode and use Open GL.
- Axonometric Projection vs Perspective. Always use Perspective when exploring the Model. The only time I see the value of Axon views is for 3D Document details. I met a user here in Seattle that does that. Amazing. But having to explore (or work) on a model in Axon view is just so last century. (FYI, to change between Axon and Perspective, and tweak those settings by right clicking on the 3D window in empty space and selecting 3D Projection Settings).
- Surfaces. We often rely too heavily on the default Surfaces. Let’s all say it together: the default images for Surfaces in ArchiCAD have been the same for a long time—was there any change between say ArchiCAD 11 and 17? And let’s also admit that they are not the greatest. But so what. You shouldn’t be relying on the default Surfaces anyways.*** It is SO SO SO easy to get better image files into ArchiCAD. In fact there is an easy way to grab those beautiful image files used in SketchUp. Here’s a video and post I did on that topic.
- Shadows. Turn them on. Shadows are pretty. Shadows are sexy. A warning: if you have an older machine, turning on shadows might slow down your 3D views more than you’d like.
- Transparency. You can turn on or off transparency in the 3D window. I prefer to keep it on (though making transparent elements opaque offers some cool visuals too).
- Background color. Change it. Here is the RGB values of the color I use: (167,205,255). It makes a nice blue. Use it. It’ll make your models feel happier. An all white background is so harsh.
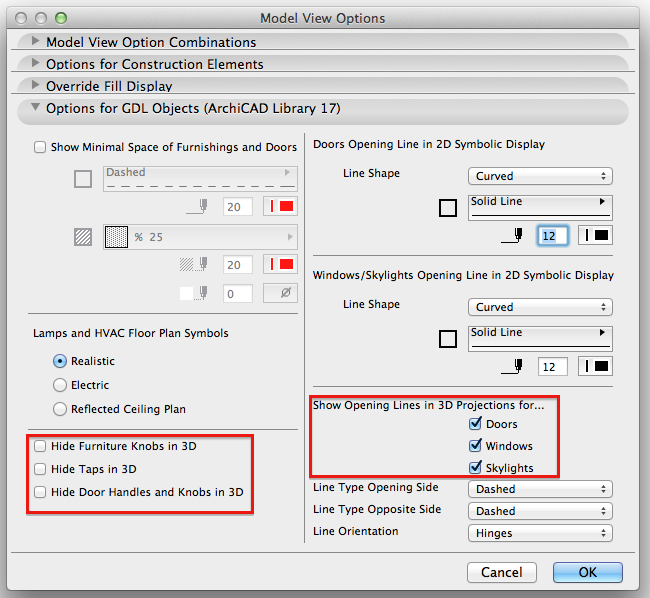
- Model View Options. Turn on/off small detail via Model View Options if your model is too complex. Or get a better computer. In the Model View Options you can also show or hide opening lines. Sometimes it’s better to turn them off.
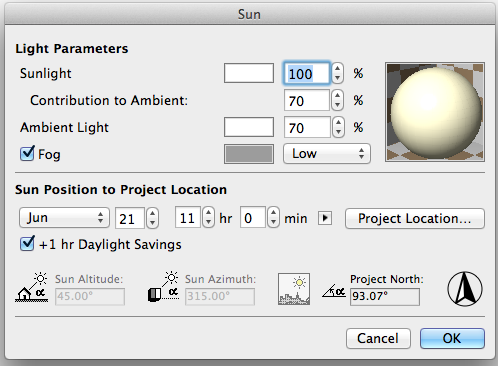
- The Sun. If your model is too dark, you can both move the sun to a better position in the sky and also just increase the brightness of the ambient light. This second technique is great if you find the shadowed side of your project too dark. Did you know you can also change the color of the sun and the ambient light? Try changing the sun and/or the ambient light color to red. You’ll see some cool things happen.
- Layers can be set to Wire frame. This is a cool solution that allows you to look through certain elements. I always make my Operators Layer Wire frame. That way I can see the cutting elements (for Solid Element Operations that involve a hidden Operator), but they don’t get in the way of the model. Wire frame Layers offer a lot of potential—wire frame roofs, walls, furniture, etc. Explore and experiment.
- Renovation Filters offer some great potential for 3D views. If you need to hide materials use Renovation Filter Overrides to make your model all white. Here’s a post and video on Shoegnome. In that video I also talk about some other techniques for monochromatic models.
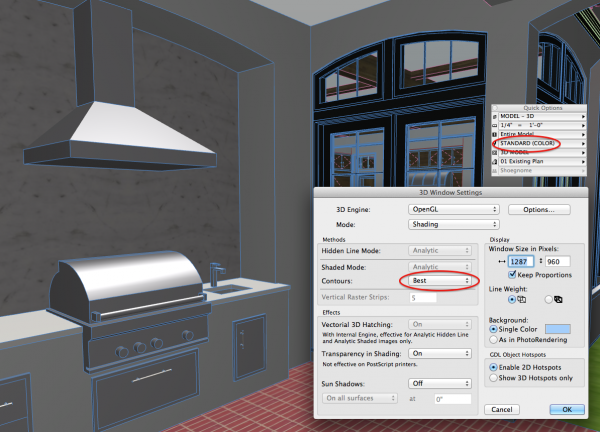
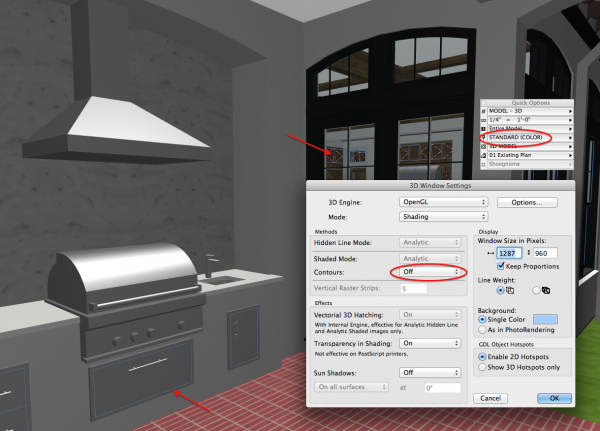
- Turn contours on or off, depending on what you prefer. Contours are probably the number one killer of Archicad 3D views. You build a beautiful model, get the right materials, and then everything is outlined in blues, pinks, greens, and reds—all the pen colors you have set up for your 2D documentation. Gross. Fix this in one of two ways. Turn off the contours or remember to change your Pen Set to an All Black Pen Set (see the earlier Pen Set articles on more about how and why to have an All Black Pen Set). Now that we’ve reached Pen Sets, I’m going to share a few examples of how much they can change the quality of the 3D window. Below is the 3D window as you probably typically see it. Contours are turned on and the Pen Set has lots of colors that help you work in 2D.
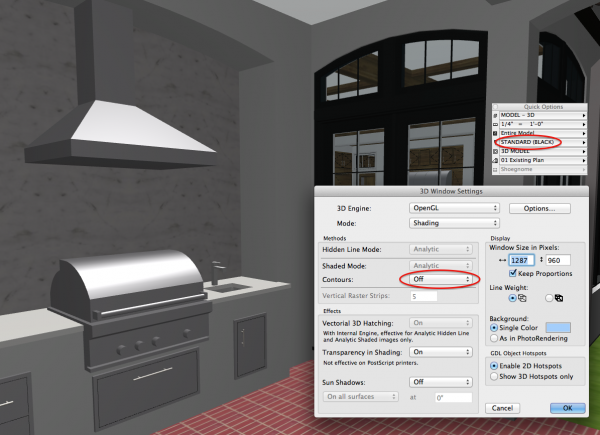
We can simply turn off the contours in the 3D Window Settings and that improves things, sort of. But it’s not perfect. You still see some door swings (which can be turned off in Model View Options), but I’ve found there are instances where not every line disappears. So with the default colored Pen Set, you still get some colored lines. I’ve highlighted some instances in the image below.
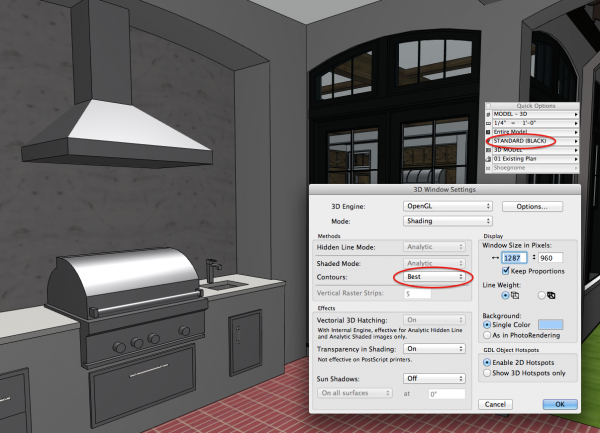
Here is the same image with the Counters off and the Pen Set turned to a Black Pen Set. Much better. Those stray lines are now harder to see.
Finally here’s the cleanest image: the Pen Set is set to Black and the contours are on. Element edges are nice and crisp. For clarity of this discussion, I’ve turned off the shadows, but if you turn those on this gets even nicer.
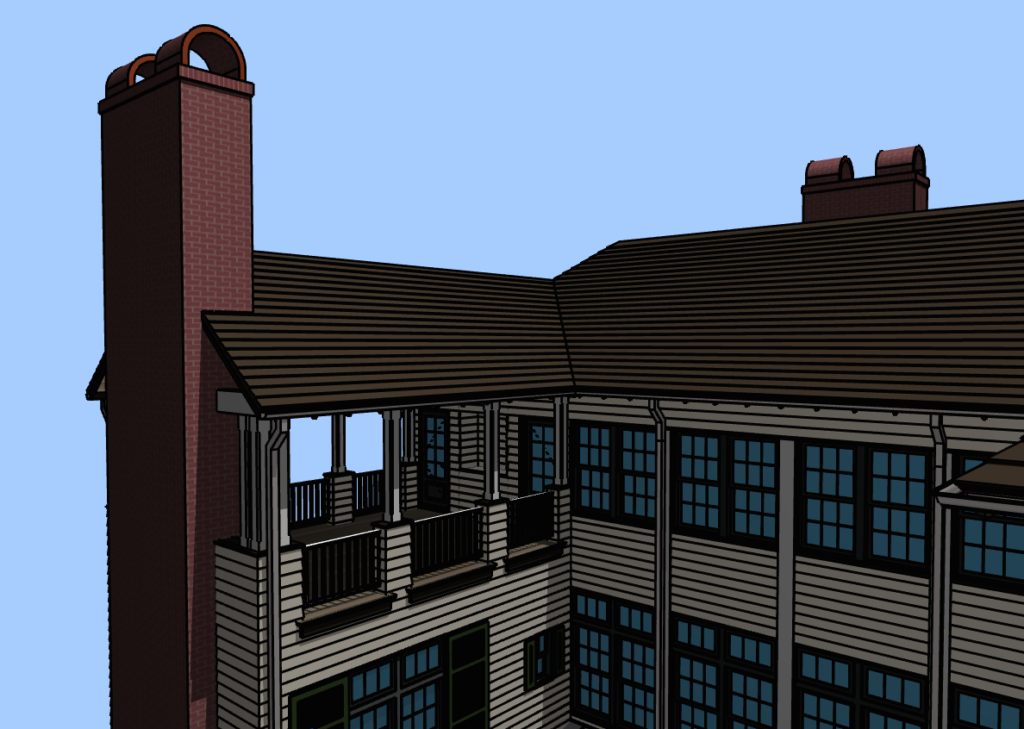
You can also change the Line Weight of the contours to be thicker. I’m not a fan of this, but maybe you’ll like it more than I do. Here’s one final image combining much of what we’ve just talked about (including the thicker lines and the non-opaque glass). When you look at this image, realize this: everything I’ve done here is just about data display. The image is a screen shot of the 3D window. It is a live view. It is done using only the minor tweaks described above and with only what can be done out of the box. I have made no changes to the model from the images above. This isn’t a visualization model. It is a production model. It is how both my clients and I can look at the model when we are exploring and working in Archicad.
Bonus Round!
Simple Screen Captures. We’ve talked a lot about how to beautify the 3D window; here’s another video of mine that shows you a great technique for when you have a few extra minutes to take a quick screen capture to the next level.
Are you following GRAPHISOFT North America on Twitter? Click Here to keep track of all the latest Archicad News in North America (and beyond). Want more on Pen Sets and Templates? I’m sure there’ll one day be a 7th post. Why not? This is a great topic. But until then Onland.info and James Murray has lots to say about Pens and Pen Sets. Check out all his posts.
***(Archicad 18 update: our default Surface options, and how easy it is to improve them, just got a whole lot better! Here’s a teaser video.)
You might also like:
More Articles:
Archicad
Customer Stories
Education
Industry News
Tips, Resources + Downloads
Webinar Recordings