 United States site instead?
Start Working in Archicad
Learn the basics before starting to work in Archicad.
Start Archicad and create a New Project
1. STEP
Do one of the following:
Click New from the Start Archicad dialog
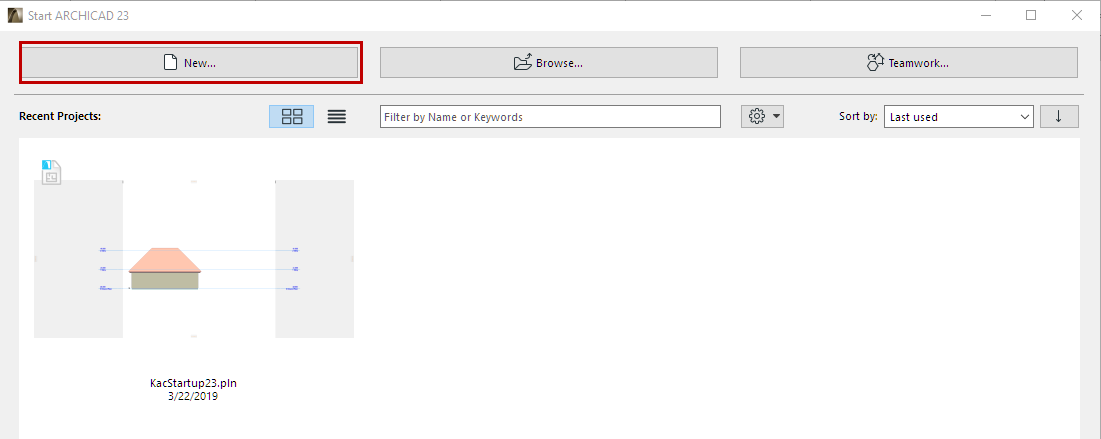
Use File > New > New from a running Archicad
2. STEP
From the appearing dialog, choose a template from the list, or browse for a different template file.
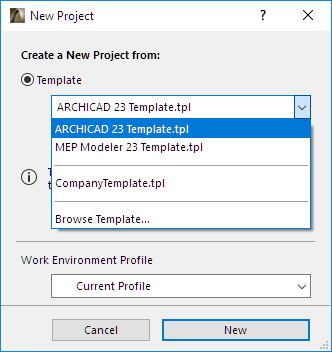
See also Template Files.
3. STEP
If you already have Archicad running: choose Latest Project Settings, rather than a template, for the new project.
Note: To automatically use the default project settings: press Alt (Opt) key with the New command. The command changes to New and Reset All.
4. STEP
Choose a Work Environment Profile for the new project.

Current Profile: Applies the profile that was in effect when you last closed Archicad, including any unnamed Custom schemes and undefined schemes.
Default Profile: This is either the factory-shipped default profile, or the profile you manually set to be the default in the Work Environment Dialog Box.
See Profile Options.
Or choose any of the defined Work Environment Profiles shown in the list.
5. Click New to create the new project.
The Archicad User Interface
Elements of User Interface
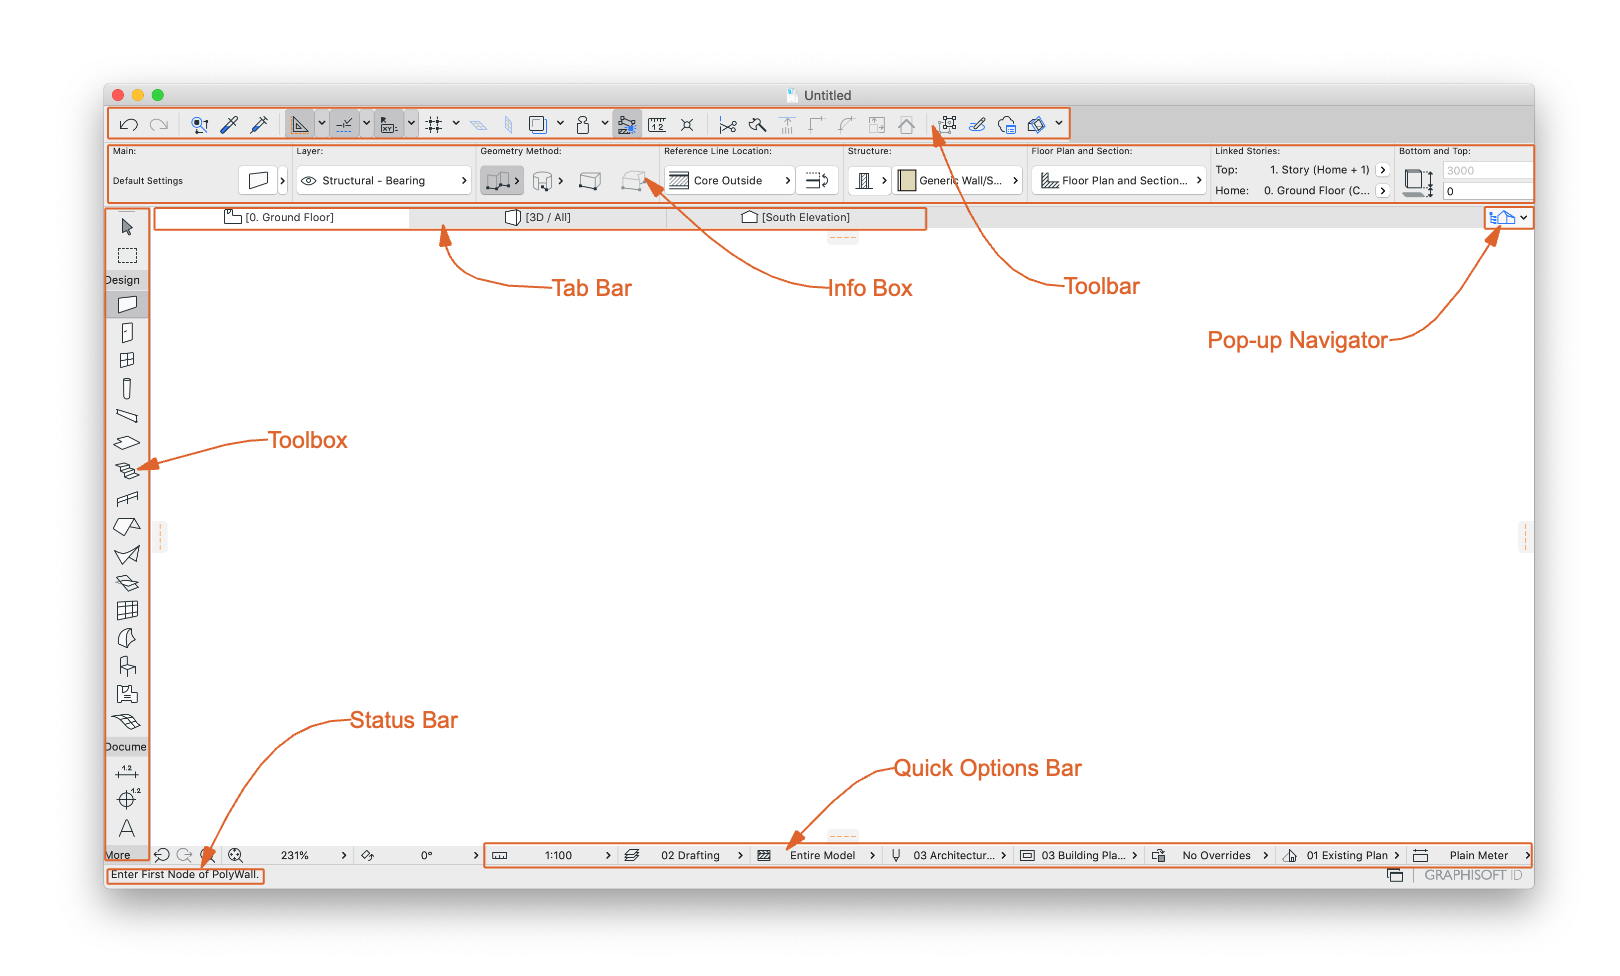
Tab Bar
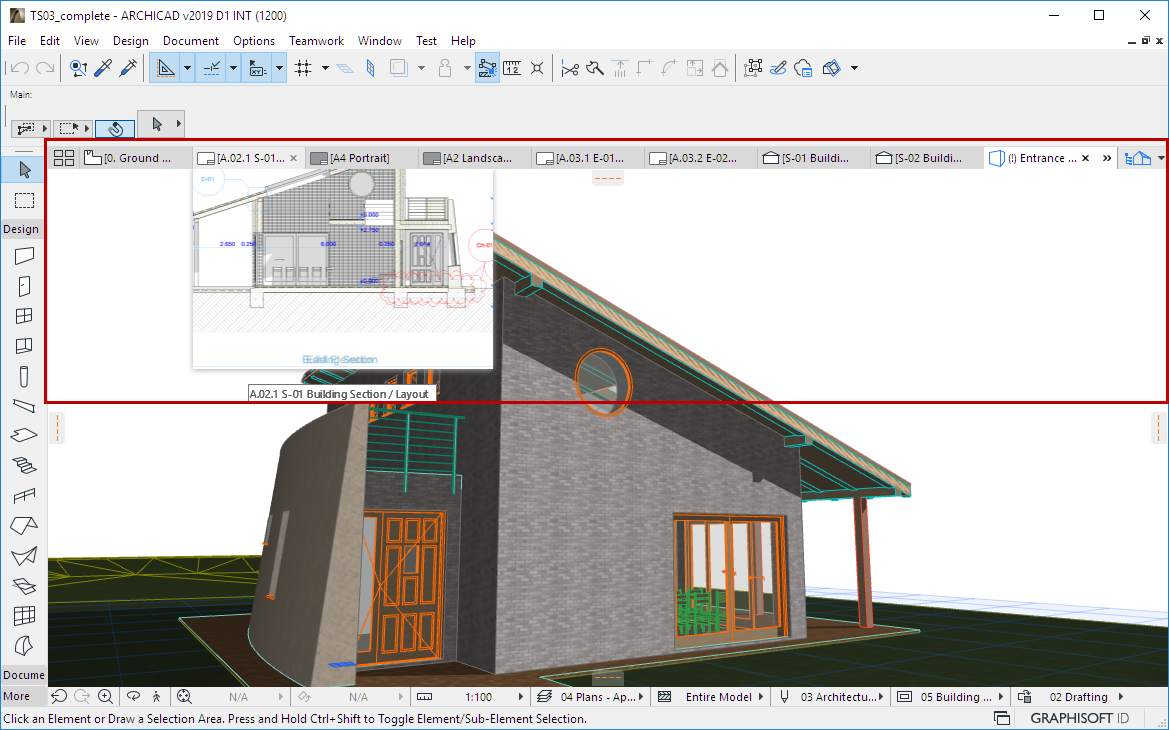
The Tab Bar at the top of your Archicad workspace shows all of your open views/viewpoints.
- Click any tab to activate that window.
- Hover over any tab to see a preview of its last opened view, with its name.
Turn off Tab Bar
The Tab Bar is visible by default. To turn it on and off, use Window > Show/Hide Tab Bar.
Turn off Tab Preview
By default, Tabs display a preview when you hover over them. Change this preference in Options > Work Environment > More Options.
Info Box
- The Info Box is a condensed collection of input and parameter controls for the currently active tool (default Settings) or selected element (Selected/Editable Settings).
- Unlike Element Settings, the Info Box stays on screen while you work.
- If several elements are selected, the Info Box displays the controls for the last selected element.
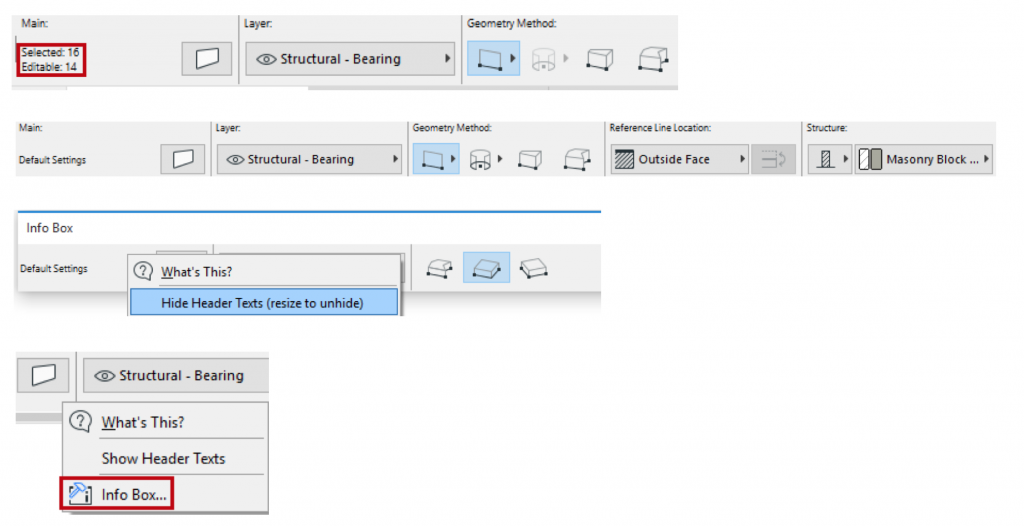
Selected/Editable: The current Info Box gives feedback on the number of Selected Elements, as well as how many of those are Editable. Changes made to Info Box settings will affect the Editable elements. (An element might not be Editable if it is on a locked layer.)
Header texts indicate what each Info Box control represents.
Display Info Box
- Windows > Palettes > Info Box
Hide Header Texts
- Right-click anywhere in the Info Box and choose Hide Header Texts.
Customizing the Info Box
- You can customize the order and visibility of panels in each Tool’s Info Box: go to Options > Work Environment and open the Info Box Customization Dialog Box.
- An easy way to access this dialog box is to open the Info Box context menu by right-clicking anywhere in the Info Box, then click Info Box…
- See Info Box Customization Dialog Box.
- You can store your customized Info Box settings as part of a Tool Scheme in your Work Environment.
- For details, see Work Environment Schemes.
Toolbox
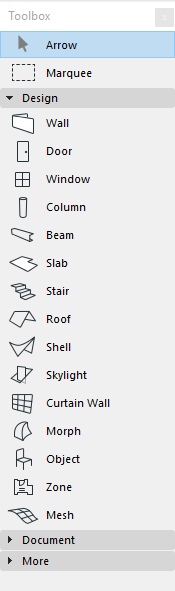
The Toolbox shows a variety of tools for selection, 3D construction, 2D drawing and visualization.
By default, the Toolbox is divided into Tool Groups -Select, Design, Document and More – to make it easier to locate the tool you need.
Additional tools can appear in the Toolbox, depending on the installation and add-ons.
Display the Toolbox
Use Windows > Palettes > Toolbox
Using the Toolbox
Do any of the following:
- Click any tool to activate it.
- Double-click to open its Tool Settings dialog box.
- Hover over the tool icon to access the Favorites chooser pop-up for that tool.
See also Favorites.
Customizing the Toolbox
- Use Options > Work Environment > Toolbox to customize the contents and arrangement of your toolbox.
- See Toolbox Customization Dialog Box.
- Store your customized Toolbox settings as part of a Tool Scheme in your Work Environment.
- For details, see Work Environment Schemes.
Quick Options Bar
The Quick Options Bar is shown by default at the bottom of the Archicad window.
Its controls show the current settings of the active tab. Use these as a quick way to apply changes among these settings, and to access the dialog box used to set up the relevant options set.
Use Window > Show/Hide Quick Options Bar to display or hide it as needed.
Controls available from the Quick Options Bar:
- See Zoom
- See Set Orientation
- See Layer Combinations
- See Scale
- See Partial Structure Display
- See Pen Sets
- See Model View Options Combinations
- See Graphic Overrides
- See Renovation
- See Dimensions Preferences
- See 3D Styles
Toolbar
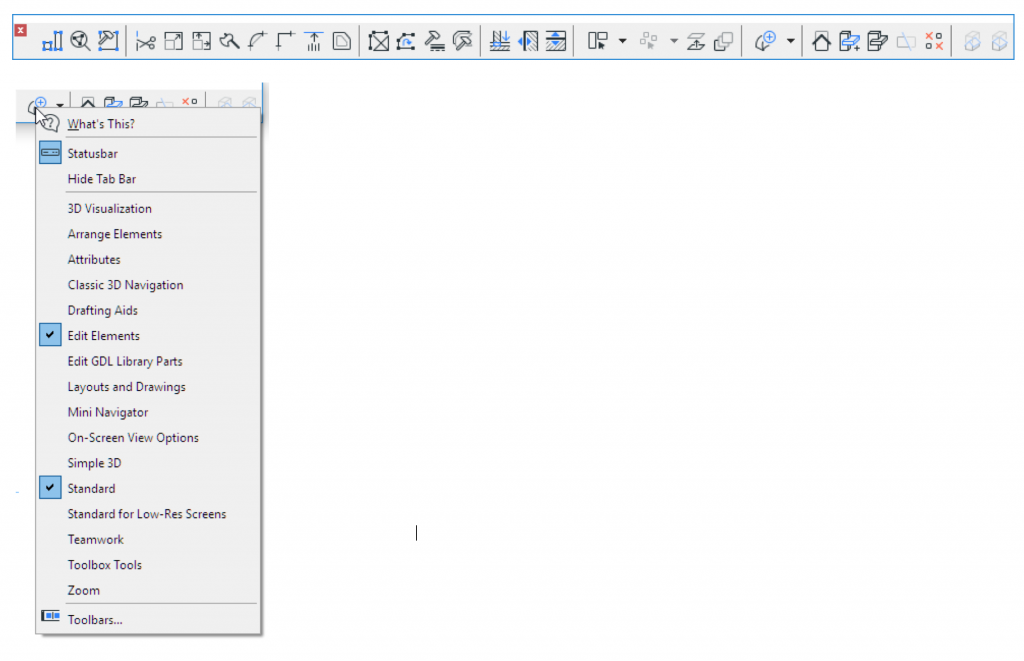
A toolbar is a collection of commands and/or menus displayed in icon or text form and grouped by topic. It’s a good way to easily access frequently used commands, by theme.
Display Toolbar
- Open a Toolbar from Window > Toolbars.
- Or from the context menu of any displayed toolbar.
- See also Arranging Palettes, Toolbars and Windows.
Create or Customize Toolbars
- Use Options > Work Environment > Toolbars
- See Toolbar Customization Dialog Box.
You can store your customized toolbars as part of a Work Environment scheme:
- The content of named toolbars are saved as part of a Command Layout Scheme.
- The on-screen display of toolbars is saved in a Workspace Scheme.
For details, see Work Environment Schemes.
Pop-up Navigator
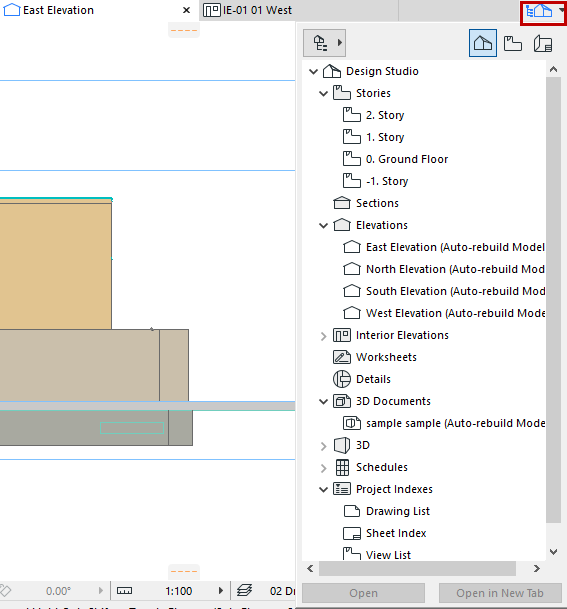
The Pop-up Navigator is accessible at the right end of the Tab Bar.
To open it: click the icon, or use the Ctrl/Cmd + Shift + N shortcut.
The Pop-up Navigator closes after any click, so it does not take up screen space when not in use.
Use it primarily to navigate among views and viewpoints of the Virtual Building. For each item, context menu commands make it easy to use relevant commands and functions.
The Pop-up Navigator replicates many of the functions of the Navigator Palette familiar from older versions of Archicad. The Navigator Palette (and the Organizer) remain available at Window > Palettes (or open them using the context menu commands of the Pop-up Navigator).
Contact Us
If you need more information or help, contact us by filling out the form.